In this tutorial, we will be using discord.js to create and then deploy a Discord bot with Nubo.

Creating a Discord.js Bot

If you already have a Discord bot programmed, simply head to the “Deploying with Nubo” section below.
This documentation assumes that you have already registered a Discord application and bot via the discord developers portal.

Setup a new codebase

1

Initialize project

npm init
Using Bun? Use the blank template and rename your index.ts file to index.js. At this moment, Bun is not directly supported with Nubo and Node will be used at runtime. Therefore, TypeScript isn’t supported by default.
2

Install dotenv

The dotenv package will make variables stored in our .env available at runtime. This is required to register our commands.
npm install dotenv --save
This step is not required if you are using Bun. This is because Bun automatically makes .env variables available at runtime. This is why we love Bun!

Registering our slash commands

For now, there isn’t a good way to securely handle environment variables at build time with Nubo. Therefore, we must register our commands locally. In the future, we will support build environment variables that will allow us to run this register command for every build automatically.
1

Create a registerCommands.js file

This file will interact with the Discord API to register your slash commands.The contents of this file should look like:
registerCommands.js
import { REST, Routes } from 'discord.js';
import dotenv from "dotenv/config"

const commands = [
    {
        name: 'ping',
        description: 'Replies with Pong!',
    },
];

const rest = new REST({ version: '10' }).setToken(process.env.TOKEN);

try {
    console.log('Started refreshing application (/) commands.');

    await rest.put(Routes.applicationCommands(process.env.CLIENT_ID), { body: commands });

    console.log('Successfully reloaded application (/) commands.');
} catch (error) {
    console.error(error);
}
As we can see, this is registering one command: the “ping” command. Which, by our description simply replies with “pong”.
2

Create a .env file

Create a .env file in the project’s root directory that will hold our secrets.
Be sure to add this file to your .gitignore so that your secrets are not publicly exposed to your Git repository.
Input the following content to your .env file and replace with your application secrets:
CLIENT_ID="your discord application id"
TOKEN="your discord bot token"
3

Register the commands

To register the commands, run the registerCommands.js file:
node run registerCommands.js
You should receive a success message in your terminal that looks like:
Successfully reloaded application (/) commands

Programming the /ping command

Create an index.js file with the following content:
index.js
import { Client, Events, GatewayIntentBits } from 'discord.js';
import dotenv from 'dotenv/config'

const client = new Client({ intents: [GatewayIntentBits.Guilds] });

client.on(Events.ClientReady, readyClient => {
  console.log(`Logged in as ${readyClient.user.tag}!`);
});

client.on(Events.InteractionCreate, async interaction => {
  if (!interaction.isChatInputCommand()) return;

  if (interaction.commandName === 'ping') {
    await interaction.reply('Pong!');
  }
});

client.login(process.env.TOKEN);
This logic simply logs in as the bot on startup and handles the /ping command. To test this bot locally, simply run the following:
node index.js
Your bot should now be up and running. You may add it to your server and test the /ping command. Congratulations! You have successfully built a very basic Discord bot using discord.js.

Push changes to GitHub

Stage all changes:
git add .
Commit changes:
git commit -m "Initial commit"
Push to GitHub:
git push

Deploying with Nubo

1

Configuring start script

First we must create a start script that tells Nubo to run our bot as the default process for the container.Edit your package.json, and add a “scripts” section. Example:
package.json
{
    "name": "discordjs-starter",
    "module": "index.ts",
    "type": "module",
    "private": true,
    "scripts": {
        "start": "node index.js" <-- This line
    },
    ....
}
This start script does not change if you are using Bun. As the Bun runtime is not supported yet with Nubo.
2

Push your changes to GitHub

Stage all changes:
git add .
Commit changes:
git commit -m "build: setup for Nubo"
Push to GitHub:
git push
3

Deploy via the Nubo dashboard

Head over to the Nubo dashboard. You will need to create or select an existing Project.
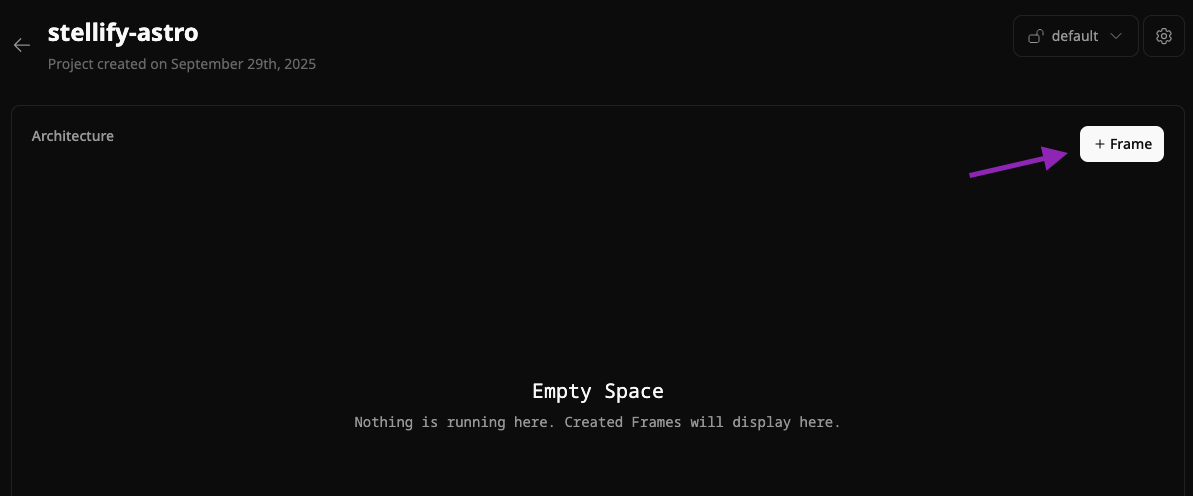
Projects section of dashboard
Now, select the ”+ Frame” button
Frame button section of dashboard
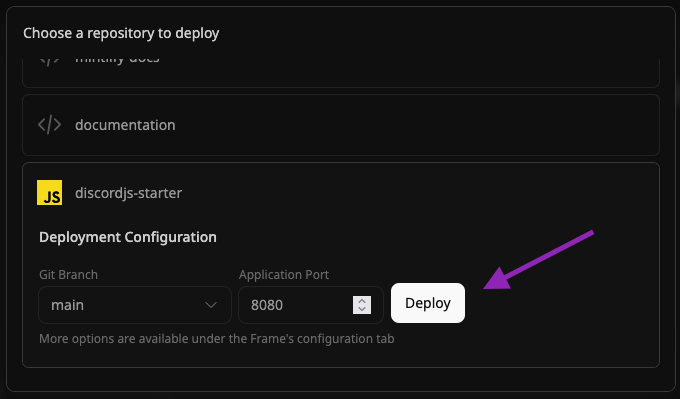
Next, choose your repository and click “Deploy”
Select repository section
4

Configure environment variables for secrets

Now that our Frame is deploying, the bot will not work until we provide our credentials.Head over to the Frame’s settings, and click “Environment variables”.
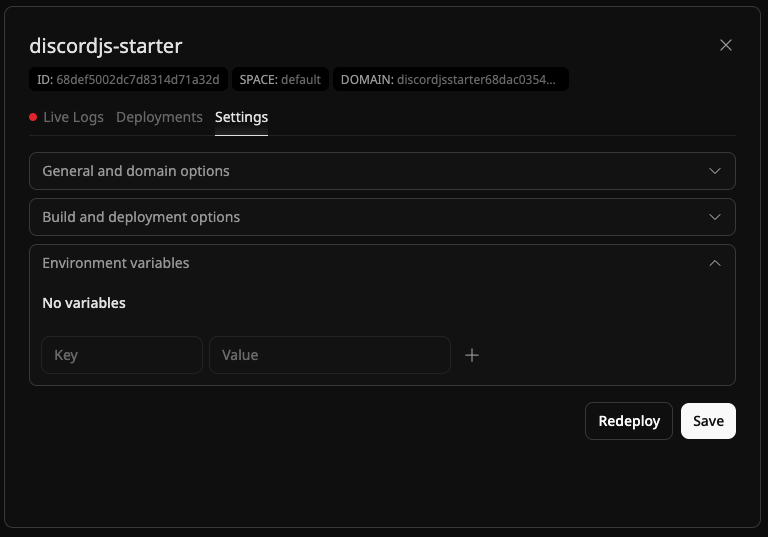
Frame environment variables
We will want to create two environment variables. Those being the following:
KeyValue
CLIENT_IDThe application ID for your bot
TOKENThe secret token for your bot
The “key” names are assuming that you are using those keywords in your bot’s code. If they are named something else, change the key names.
Now, select the “Redeploy” button to manually schedule a Frame deployment.
Redeploy button
That is the procedure for getting a Discord bot deployed with Nubo.

Demo repository

Take a look at the starter repo for a complete working example.
I