First, let’s define a static site. A static site is a website made up of pre-built HTML, CSS, and JavaScript. They are served directly to the end user’s browser. There is no server-side processing, the content served is the same on every request.
Some examples of static sites would include blogs, docs, landing pages, or portfolio sites. On another note, if you are using React or another reactive framework, excluding the ones with SSR (like Next.js or SvelteKit), the output of the build is a static site. Though for those cases, we recommend following our dedicated framework guides.
In order to deploy a static site with Nubo, we must configure an HTTP server that will serve our static assets to the end user. To do this, we can either use Apache or Nginx. Below will illustrate the process for both.
Using Apache
Nubo will detect that you’d like to use Apache if either of the following is true:
- There exists a
httpd.conf file in the root directory
- There is a
BP_WEB_SERVER build variable that is set to httpd
In this guide we will be using the second option as we don’t need fine-grained control over the configuration.
By setting this environment variable, it will automatically generate a default httpd.conf for us.
Setting up a project.toml
A project.toml file in the project’s root directory allows us to configure information about our application and also configure the build process.
In this case we would like to set a few environment variables that trigger and setup an Apache web server.
[project]
id = "httpd-starter"
name = "Httpd Starter"
version = "1.0.0"

[build]
exclude = ["README.md"]

[[build.env]]
name = "BP_WEB_SERVER"
value = "httpd"

[[build.env]]
name = "BP_WEB_SERVER_ROOT"
value = "."

[[build.env]]
name = "BPE_PORT"
value = "8080"
Note that the BP_WEB_SERVER_ROOT variable should match the location of where your index.html file is
Take note at the BPE_PORT variable, this makes the PORT environment variable available at runtime. This port will be required when deploying the Frame in the Nubo dashboard.
Using Nginx
Nubo will detect that you’d like to use Nginx if either of the following is true:
- There exists a
nginx.conf file in the root directory
- There is a
BP_WEB_SERVER build variable that is set to nginx
In this guide we will be using the second option as we don’t need fine-grained control over the configuration.
By setting this environment variable, it will automatically generate a default nginx.conf for us.
Setting up a project.toml
A project.toml file in the project’s root directory allows us to configure information about our application and also configure the build process.
In this case we would like to set a few environment variables that trigger and setup a Nginx web server.
[project]
id = "nginx-starter"
name = "Nginx Starter"
version = "1.0.0"

[build]
exclude = ["README.md"]

[[build.env]]
name = "BP_WEB_SERVER"
value = "nginx"

[[build.env]]
name = "BP_WEB_SERVER_ROOT"
value = "."

[[build.env]]
name = "BPE_PORT"
value = "8080"
Note that the BP_WEB_SERVER_ROOT variable should match the location of where your index.html file is
Take note at the BPE_PORT variable, this makes the PORT environment variable available at runtime. This port will be required when deploying the Frame in the Nubo dashboard.
Going live with Nubo
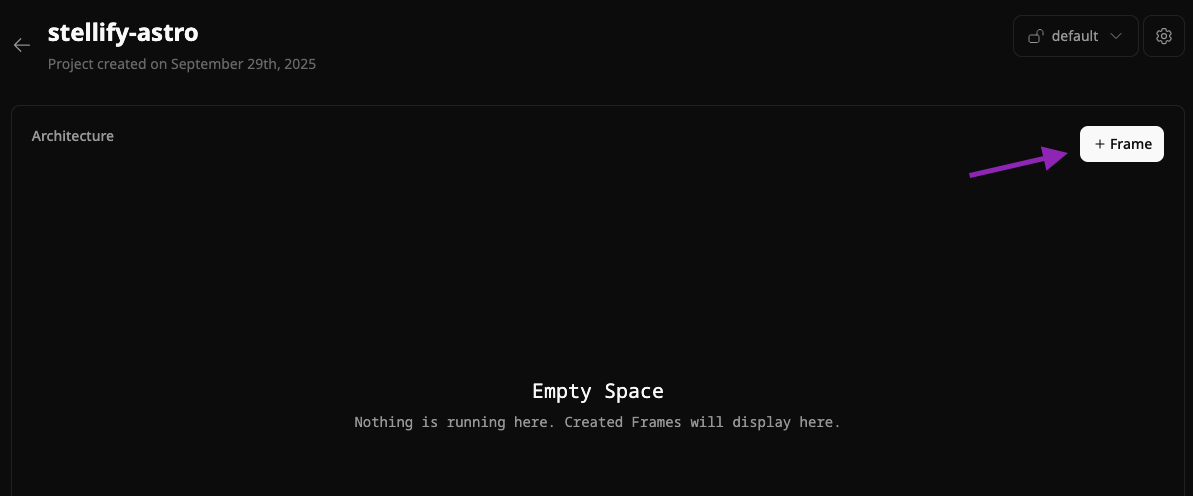
Open the new Frame modal
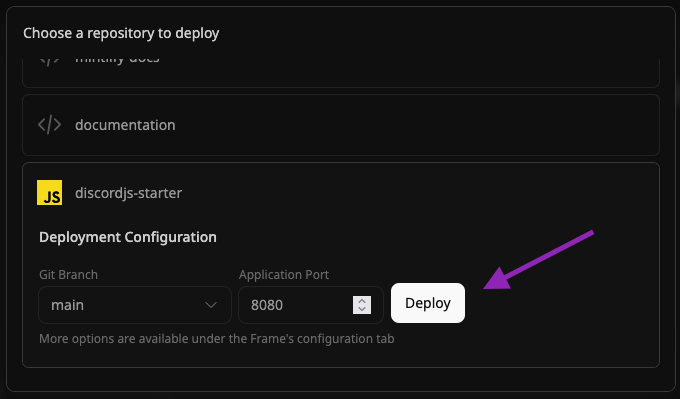
Click on the ”+ Frame” butotn Choose repository and configure port
Select your repository from the list of repos that are displayed. Then, if applicable, configure your port to match the port that your server is listening on. 

